Battle Draw Review: Troop Cards Placed by Drawing Lines
How a drawn line turns one troop card into a row of warriors, archers or Mammoths: a Battle Draw review of a portrait castle-siege battler.
Game at a glance
Battle Draw
8.5/ 10
Our score
This is what Clash Royale 2.0 looks like.
In this article6 sections
Tap a troop card, drag a finger across the grass, and a row of soldiers stands along the line. Battle Draw keeps the card hand and the energy bar of games like clash royale, with a castle to knock down at the far end of a portrait battlefield, and places its troops by drawing lines.
We played the two tutorial battles against Tutorial Bot and two matches against named opponents, the second of them unfinished. Drawing shifts the familiar card battle toward real-time strategy (RTS), and to us the result looks like where that formula goes next.
Drawing rows of troops toward the castle
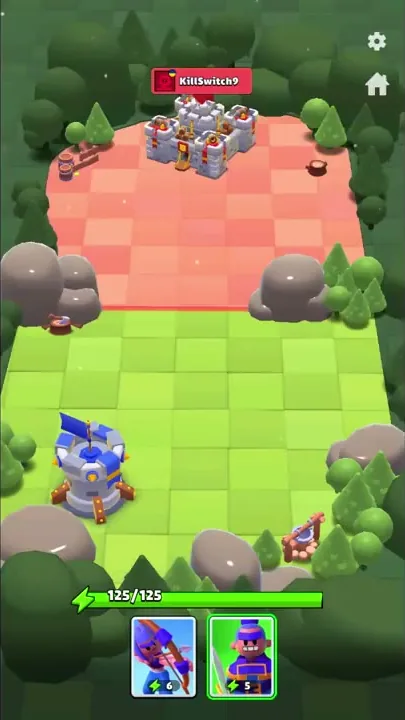
Each side has a base. The player’s is a round blue-and-white tower with a blue flag in the green half of the field. The opponent’s was a single red-flagged tower in the first tutorial battle and a castle of several white towers with red banners in the battles after it. Knocking the enemy base down wins: under attack, it shows a red health bar with a number, and once it falls a VICTORY screen marks the opponent’s panel “Defeated” beside a cracked shield.
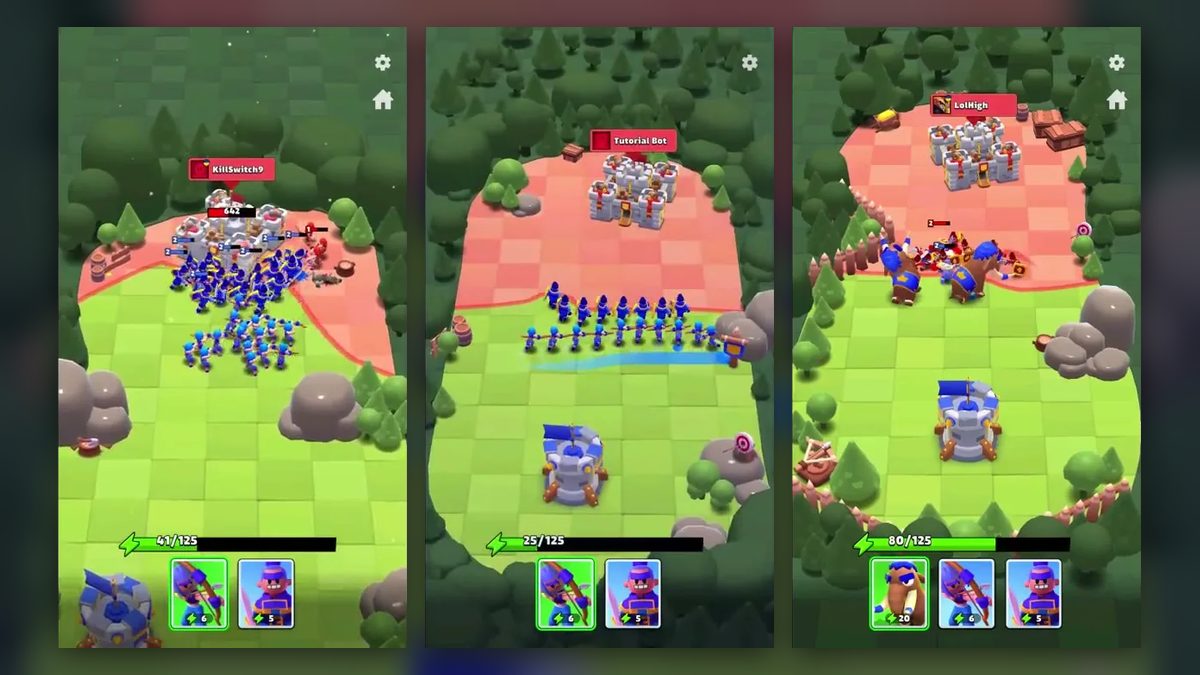
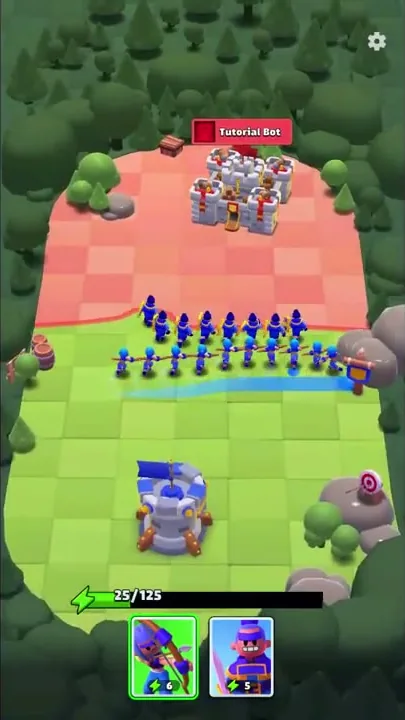
Every placement takes a tap and a stroke. Tapping a card in the hand at the bottom selects it and puts a green frame around it. Drawing on the field then sets down a row of that troop along the stroke, standing on a glowing light-blue trail, so two strokes can make a formation: a row of warriors across the middle with a row of archers right behind. Once down, the rows walk toward the enemy base and fight what they meet, with no steering from the player afterward.
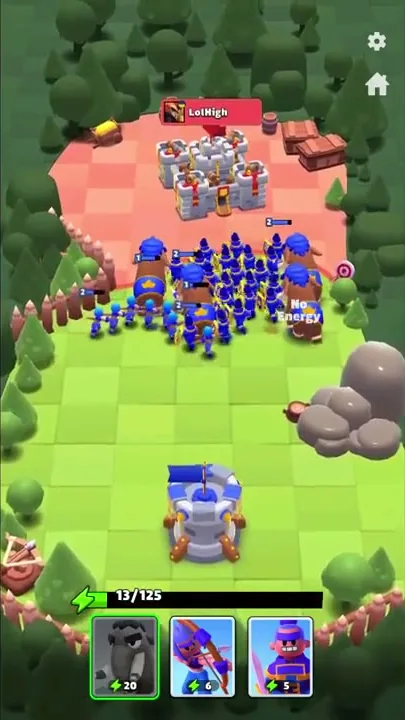
Energy pays for the cards. A green bar above the hand holds up to 125, and each card prints a cost beside a lightning bolt: 5 for the Warrior, 6 for the Archer and 20 for the Mammoth. The bar drops as troops are drawn and climbs back over time. Partway through the fourth battle, with the bar nearly empty, the Mammoth card is grayed out while the two cheaper cards stay lit, and a “No Energy” note pops up on the field.
The Warrior is the melee troop, a small soldier with a sword and a blue-and-gold shield. It is the only card in the first tutorial battle, where a dense crowd of warriors pushes up to the lone enemy tower, and later it forms the front row of drawn formations.
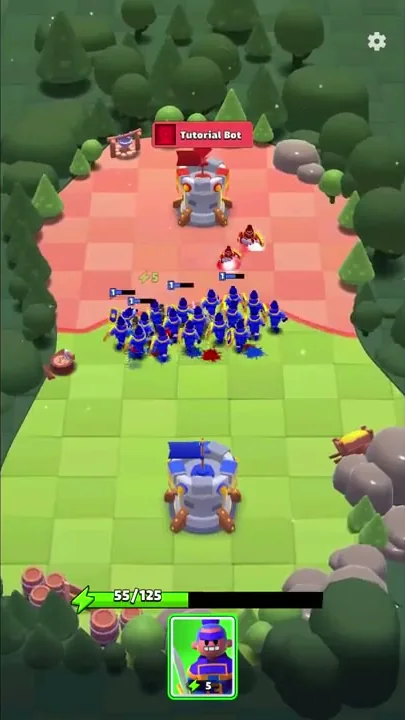
The Archer carries a bow and joins the hand in the second tutorial battle. Archers are drawn as a row behind the warriors and stay back in a loose line while the warriors push into the castle or trade blows with red troops at the front.
The Mammoth, a large beast with a blue saddle cloth, is the most expensive of the three cards. It first appears in the card collection and then in the hand for the fourth battle, where two of them wade into a group of red troops and several later reach the castle walls together with the infantry.
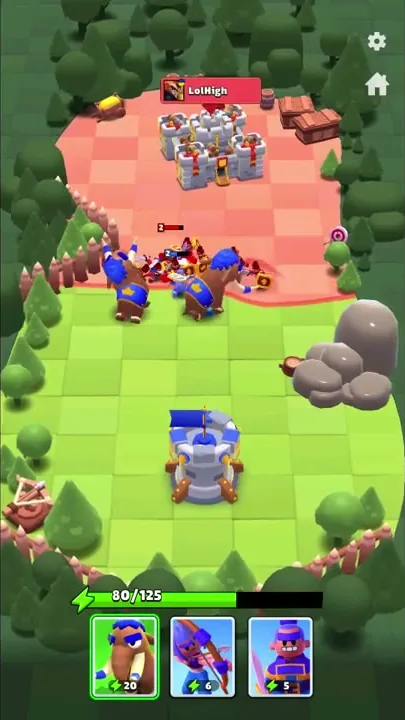
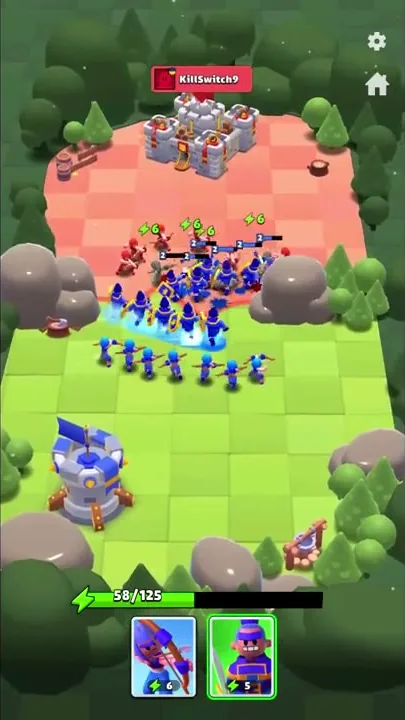
The opponent fields troops dressed in red. Two of them stand near the tower in the first tutorial battle, and in the next one a file of four comes in from the left as the blue army closes on the castle. Red troops meet the warriors head-on against KillSwitch9 and run into the Mammoths against LolHigh.
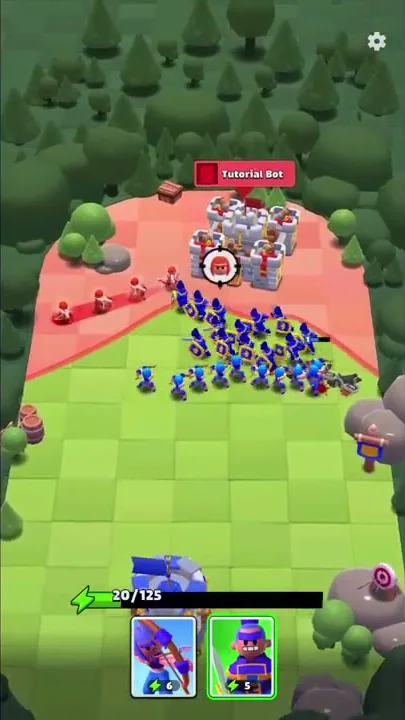
The ground is split into two colors. A red-tinted zone surrounds the enemy base and a green zone covers the player’s side, and the border between them moves and bends with the fighting. In the first tutorial battle the red shrinks to a pocket around the enemy tower; against KillSwitch9 it curves back around the spot where the blue troops push in.
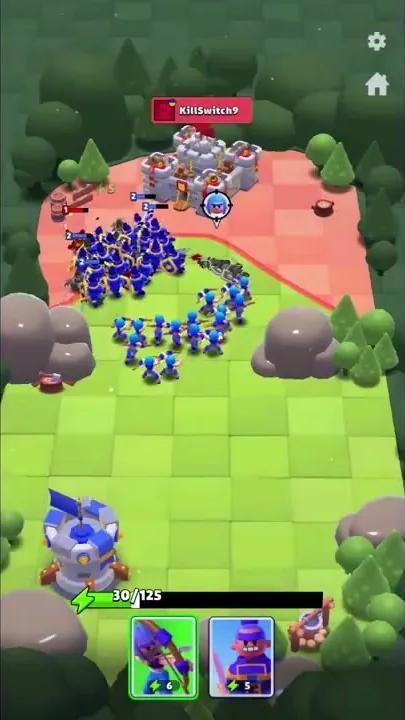
Smaller markers sit on top of the action. Units carry little health bars with a number beside each one. Green lightning-bolt labels showing a 5 or a 6 float over the fighting, and a round crosshair with a face icon hovers over the enemy castle or over a unit in the scrum. As the army advances, the camera slides toward the enemy base until the player’s tower sits at or below the bottom edge.
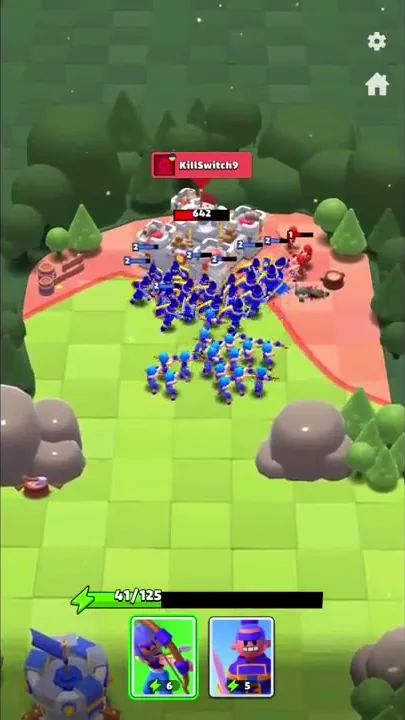
Against KillSwitch9, the energy bar starts full at 125 with the 5-energy Warrior card already selected. Warriors drawn toward the middle meet red troops between two rock outcrops while a row of archers waits behind them, and the crowd works its way up until the castle’s health bar shows above its walls. VICTORY follows, and 1145 coins of loot stream into the counter.
From Tutorial Bot to a three-card deck
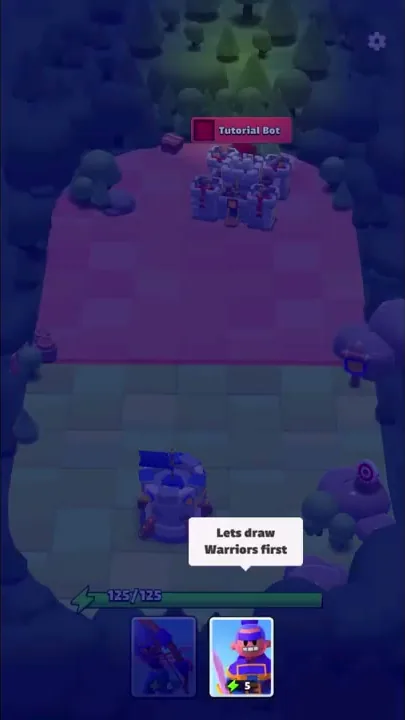
The hand grows one card at a time. The first tutorial battle offers the Warrior alone against a single tower. Its follow-up puts the Archer next to it, replaces the tower with a castle that sends out red troops, and opens on a dimmed field with the hint “Lets draw Warriors first” over a full energy bar. A third card, the Mammoth, is in the collection by the fourth battle, the first with three cards in hand.
After the tutorial, opponents have names. The home screen’s Battle button leads to a VS screen that sets KillSwitch9’s name and avatar above the player’s “You” panel, and the match after that begins with a “Searching for opponent…” screen. A bronze badge sits beside “You” on these screens and on the VICTORY screens, and beside the opponent’s name on the VS screen.
The fields change as well. KillSwitch9’s has a large rock outcrop on each side where the red and green zones meet, with the player’s tower moved to the left, and a house icon now sits under the gear icon in the corner. Early in the fourth battle, a wooden stake fence runs along the left edge and crates stand beside the castle. The player’s tower is back in the center of the green zone, with a rock outcrop off to its right.
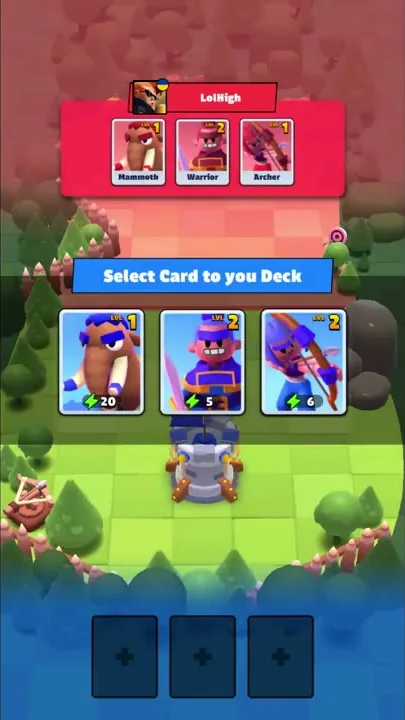
The fourth battle also brings a step before the fight. A “Select Card to you Deck” screen shows LolHigh’s three cards in a red panel at the top, the same three troops the player owns, with the player’s cards below and three empty deck slots at the bottom.
Coins are the currency between matches. The VICTORY screens carry a “Your Loot” panel whose coins fly up into the counter at the top right: 200 after the first tutorial battle, then 167 after the second along with a purple “?” card icon showing 0.
Cards arrive as rewards too. After the second tutorial battle, a reward screen shows “+1” on the Archer and “+0” on the Warrior, each above a green progress bar that counts cards, with “Tap to Continue” at the bottom.
Coins buy card levels. Each card wears a LVL badge, and the Cards screen gives it a green Level Up button priced in coins. Right after the tutorial battles, a guided step points at the Warrior’s 300-coin button with the hint “Upgrade Warriors to make them Stronger”, and the Warrior shows LVL 2 afterward. The Archer’s button later asks for 500 coins, and the deck screen before the fourth battle lists the Archer at LVL 2.
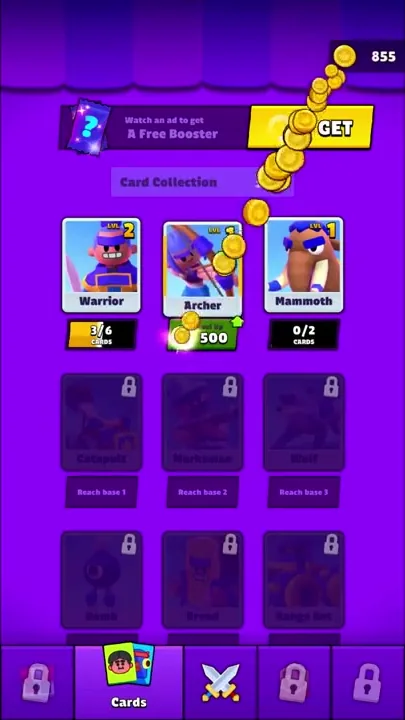
The same screen holds the Card Collection, three cards to a row. During the upgrade tutorial the third slot of the top row is still padlocked, and the next time the screen appears the Mammoth fills it. The remaining slots carry padlocks, with the second row’s three labeled “Reach base 1” through “Reach base 3”. A banner across the top reads “Watch an ad to get A Free Booster”, beside a purple “?” card icon and a yellow “GET” button.
The home screen puts “FOREST CASTLE” above a 3D castle with a blue flag on a grass island, with a yellow Battle button below. Its bottom bar has five tabs: Cards and Battle are open, and the other three carry padlocks. After the third battle, a green up arrow sits over the Cards tab.
Formations drawn by hand on a card battler
One strength is the formation drawing laid on top of Clash Royale’s play and rules. The card hand and the energy costs carry over, and so does the castle siege. What changes is placement, which the tutorial hint “Lets draw Warriors first” frames as drawing, with troops standing in rows along each stroke.
That drawing also raises the demand on the player’s skill at laying out and controlling individual soldiers and units. Every stroke decides where a whole row of small troops will stand, and a front line of warriors with archers a step behind, as in the second tutorial battle, is a shape the player builds by hand.
Overall it plays more like an RTS. In the fourth battle, several Mammoths end up crowding the enemy castle alongside warriors and archers, all of it moving at once, and in portrait the whole thing comes across as a light RTS. It also sits a step further toward midcore, between casual and hardcore, than the earlier Draw Attack and Draw Battle 3D. We can even picture it crossed with a war strategy game for an RTS-plus-strategy blend.
The artwork is above the passing line: low-poly cartoon 3D under a tilted overhead camera, a checkered grass arena ringed by rounded trees and rocks, and props such as crates and an archery target. Blue marks the player’s side and red the opponent’s, from the troops and name tags to the field zones.
Room for heroes and skill buttons
We have no complaints about the game itself. The one wish is for heroes, each with one or two skills and buttons of their own. During a fight, the screen holds the energy bar and the troop cards, plus a gear icon in the top corner (with a house icon below it from the third battle).
All three completed battles ended on the VICTORY screen, so we can’t say what a loss looks like or whether the player’s tower ever comes under fire. The matchmaking screen reads “Searching for opponent…”, but whether KillSwitch9 and LolHigh are other people or bots is something we can’t tell.
Sketching formations, then watching them march
The play is arranging an army by hand. A battle is a string of choices about which card to use, where its line should go and whether the bar can cover it, from the 5-energy Warrior card at the front to the 20-energy Mammoth. Across the four battles, the rows fought on their own once they were down, so the taste this serves is setting up a formation and then watching it collide with the red troops at the castle.
Between matches, the VICTORY loot goes into Level Up buttons, and the deck screen shows the opponent’s cards before the pick. The battles themselves run in real time with both armies on the field at once, a different format from games like Capybara Go, the event-by-event roguelite starring a capybara.
Verdict
In our view, Battle Draw is Clash Royale in a 2.0 form. Bases, cards and an energy bar all carry over, and drawing makes placement a matter of shaping formations by hand. What comes out is a strategy battle in real time, played upright and kept on the light side.