Chrome Valley Customs Review: A Muscle Car, Board by Board
Our Chrome Valley Customs review follows a rusty muscle car from strip-down to desert-highway reveal, paid for with coins won on match-3 boards.
Game at a glance
Chrome Valley Customs
8.5/ 10
Our score
Match-3 never stops chasing high-spending male players; casual games go in cycles.
In this article6 sections
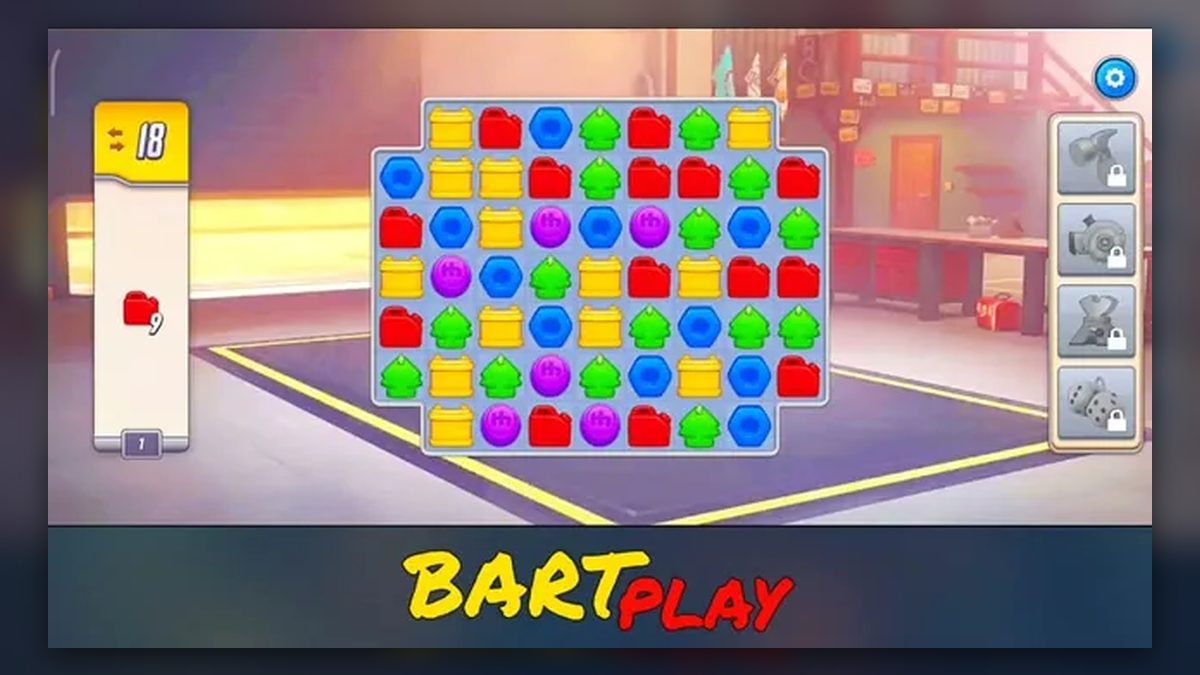
The first board in Chrome Valley Customs asks for 15 red gas cans in 20 moves. Win it, and coins burst across a garage floor where a rusty classic muscle car waits on a lift to be rebuilt, one paid task at a time.
On the puzzle side it is one of the match 3 games, in the same family as games like royal match, with a full car restoration built around the boards. We see it as a Project Makeover for male players, makeup traded for engines and paint, though it is more than a straight swap. In the ten levels we played, the car went from bare rust to a finished build handed to its customer.
Matching shop tokens around crates called Boxes
Play runs in landscape, with the board in the middle and four tool slots down the right edge. A panel on the left lists the goals under a move counter, and a level is won by collecting everything in it, token counts or Boxes, before the counter reaches zero. Finished goals get a green check, and a chrome-and-red Chrome Valley Customs banner sweeps over the board at the win. One hint states the rule outright: “Reach the target to win the level!”
The tokens are glossy car-shop objects of five kinds: red gas cans, yellow box tokens, blue hex nuts, green cone-shaped tokens and purple round ones. Lining up three or more of a kind collects them, as the first tutorial says: “Match 3 Tokens to collect them.”
Moves are drags: the tutorial hand pulls a token into a highlighted neighboring cell. Special tokens fire with a swipe and tools with a tap. In the garage, a green coin-price button buys each task, and a green check confirms each choice made with option buttons, color swatches or a slider. Story scenes carry a Skip button in the top-right corner.
The two halves feed each other. A tutorial card pairs “Beat Levels” with “Earn Coins”: coins and green gems fly into the garage after a win, and the coins buy restoration task cards. Each task either plays a short repair scene or opens a picker for a part or a color, and each purchase pushes a “% Complete” bar along until the last card, Reveal Car, sends the finished car out to its customer.
Bombs come from shaped matches. The Level 3 tutorial says “Match the Token into this corner to create a Bomb,” then “Create another Bomb in a cross shape,” and the piece that results is a red barrel with a yellow hazard mark. Barrels keep turning up on later boards, and two even appear in the end-of-level bonus of Level 2, before the player has made one.
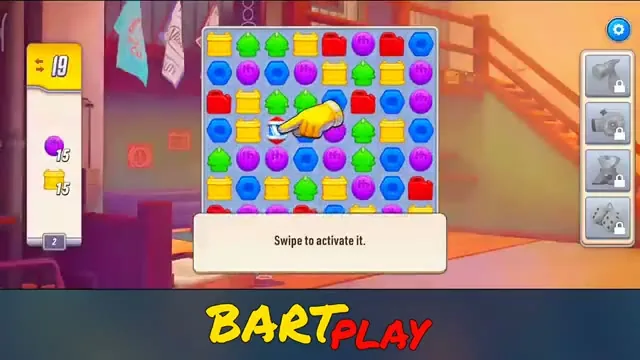
The first special piece is a round token with red-white-and-blue stripes. In Level 2 a pointing hand singles it out with the hint “Swipe to activate it.” It returns on later boards, sometimes with its stripes facing a different way.
The dial token is drawn as a gauge, a needle over a colored arc. It first shows up in Level 4, and when it goes off it shoots beams at a spread of tokens across the board at once.
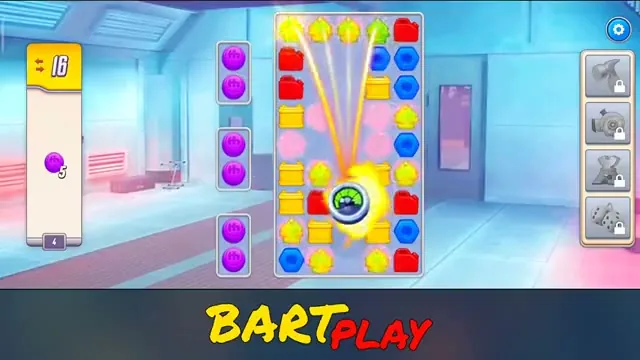
Later boards also carry a white token marked with a red cross. It sits on the board among the ordinary pieces.
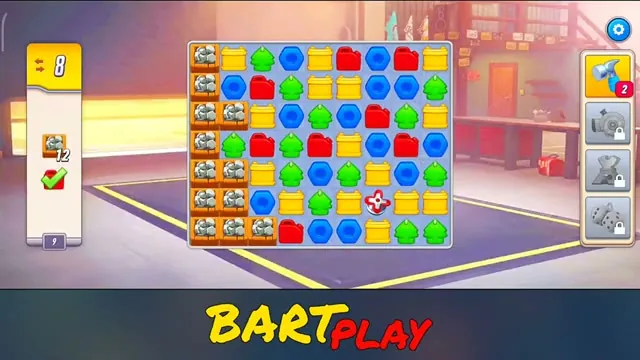
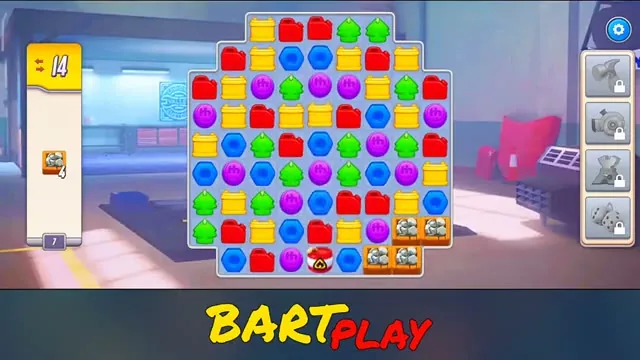
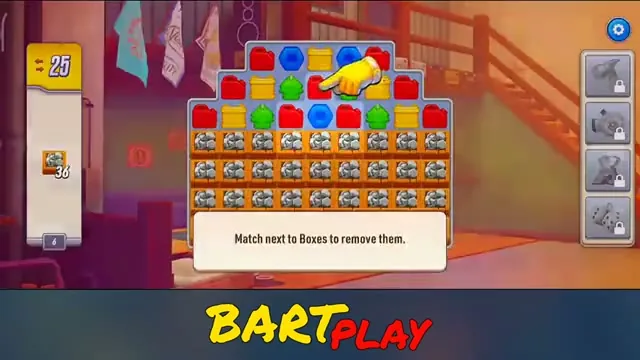
Boxes are wooden crates topped with gray metal parts, one to a cell. They arrive in Level 6 with the hint “Match next to Boxes to remove them.” A match beside a crate breaks it apart and takes it off the goal count.
The tool slots hold a hammer and three more: two other tool icons and a pair of dice. All four start padlocked. Later the hammer slot opens with a “Free” tag and the hint “Tap on the Hammer to select it.” From then on, its slot carries a red badge reading 2.
A win with moves to spare ends in a bonus run. The counter ticks down to zero while special tokens appear and go off across the board, with “Tap to Skip” underneath and a green gem tally in the goal panel.
Crate rows take up most of the eighth board. Under two rows of tokens sit three rows of Boxes with an empty row between each, then two shorter crate rows narrowing toward the bottom, and the panel asks for 39 Boxes in 26 moves. This is the board where the hammer slot opens, and the cross token turns up partway through. The goal is met with 15 moves still on the counter, and a “Perfect Restoration” banner follows.
Odd-shaped boards and the restoration task list
The first three boards are rectangles that keep growing. The opening one is 9 columns by 7 rows with its four corner cells cut away. Next comes a square board, 8 by 8, and after it one that stretches to 11 columns by 8 rows, while the goals climb from one color to two: 15 purple and 15 yellow on the second board, then 30 green cone tokens and 30 yellow box tokens in 20 moves on the third.
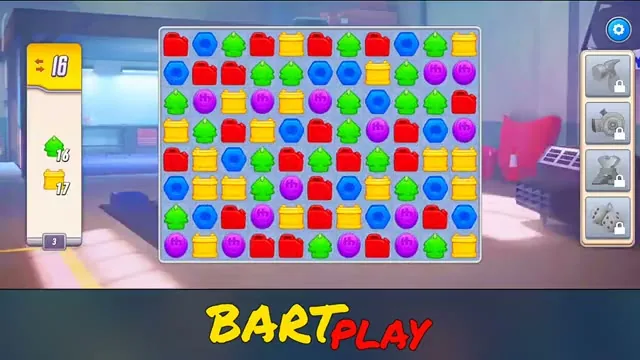
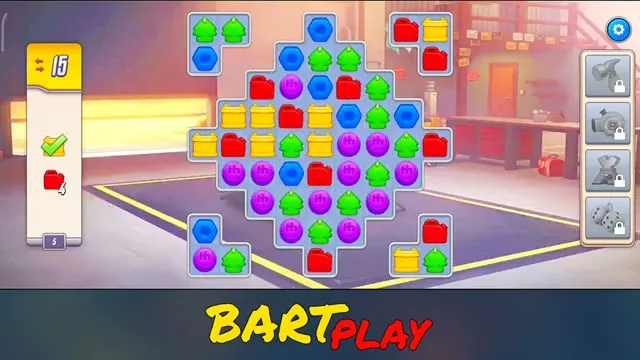
Then the shapes change. Level 4 stands a tall 5-by-9 board beside a separate column of three two-cell pockets, each holding two purple tokens, and asks for 10 purple. The next layout is a diamond whose rows widen from a single cell to 9 and narrow back to one, with an L-shaped three-cell pocket set apart in each corner; its goals are 25 yellow and 10 red.
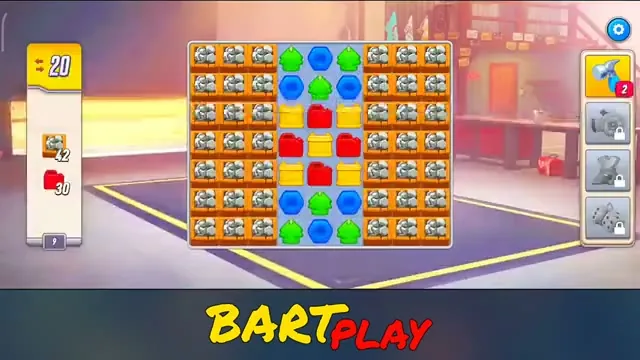
From the sixth board on, crates take over the goals. The first crate board sets 36 Boxes in four full rows under a stepped top of tokens, and partway through the seventh the remaining crates sit in clusters in the bottom corners. After the spaced-out rows of the eighth, Level 9 walls in both sides with crates three columns deep and adds 30 red gas cans to 42 Boxes, all within 20 moves. It is also the first board where the moves ran out.
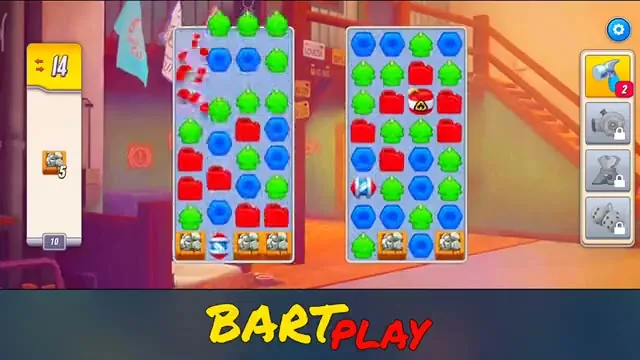
The tenth board splits play across two separate boards, each four columns wide, with crates in their lower parts. Yellow and purple tokens drop out here, and the goal is 38 Boxes.
Each level opens on a popup that shows the goal above the line “Select Boosters:” and a Play button. Its three booster slots are padlocked before Levels 1 and 4. Before Level 10 the first slot holds the striped token with a red badge reading 3, and the other two hold the red barrel and the dial token, each with a green check.
Between levels, the restoration runs on task cards. Each card shows a part icon and a green button with its coin price, from 0 to 250 coins, under a “% Complete” bar, and finished tasks get a green check. The list works through the whole car: stripping it down, new front fenders, fixing a quarter panel, a front bumper, removing the engine, new rims, a new engine, a rim color, tires, a hood with an intake, the stance, a back bumper, tail lights, headlights, a dash color, a trim color, window tint, paint, a Machine Polish priced at 0, decals and finally Reveal Car. Tasks and Leaderboard tabs run along the bottom of the task screen.
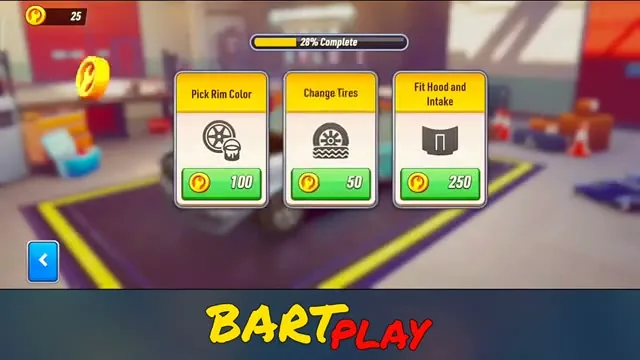
Many tasks come with a choice of parts. Body panels, rims, tires, the hood, the rear wing, lights, the dashboard and the steering wheel each offer three option buttons down the left side. The car on the lift changes to show the selected option, and a Hank’s Notes card names and describes it before a green check locks it in.
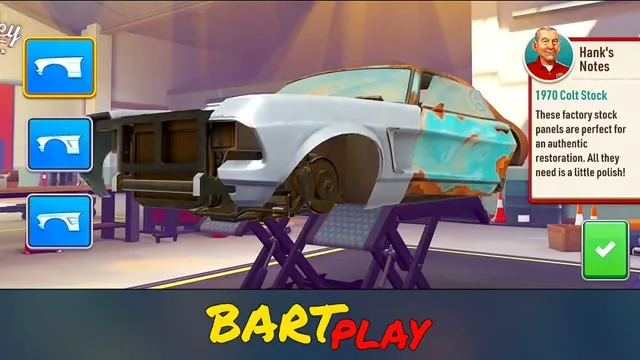
Other jobs use pickers: the rims get 8 color swatches, as do the dash and the trim, while stance is set on a vertical slider with settings named Lowered and Medium. Window tint offers 5 shades from white to dark gray. The paint booth has 10 colors, and the 6 decal options include flames and stripes.
Coins are gold with a wrench symbol and are counted at the top of the task and home screens. They burst into the garage after wins, and some wins end on a “Perfect Restoration” banner showing a coin and 300. Green gems are the second currency, with their own counter and a “+” button on the home screen, and they fly in alongside the coins.
Gems also pay for a second chance. When the moves ran out on Level 9 with 8 Boxes still standing, a “Continue?” popup offered “+5” with the line “Add 5 moves to keep playing!” for 900 gems, and the level was finished within those extra moves. Lives sit at the top left as a heart showing 5 with the word Full.
On the home screen the car stands in the garage, and a round orange button shows the next level number. A clipboard button, sometimes with a red “!” badge, sits next to a car button, and a third button joins them later, while camera and settings icons sit at the top right. A separate garage view has a back arrow and a bar of part icons along the bottom: three part icons, then padlocked slots.
Hank’s Notes and the Chrome Valley crew
The premise, clear-the-board puzzling with a car to restore, is only the starting point: the story is worked out in detail. Setup opens with Uncle Hank, the Garage Owner, welcoming the player to “the best auto shop around” before a name prompt asks, “What should we call you?” As the work goes on, Donna, the Engine Specialist, needs “a replacement 1970 iron block in a hurry.” Big Rig, the Mechanic, says “Rain or shine, Taylor’s gonna be riding in style on those tires.”
After the paint job, Angelo, the Paint Expert, says the car “doesn’t have that Chrome Valley gleam yet.” Taylor is the customer the whole build is for, and Taylor’s reaction to the finished car closes it out.
The menus are just as detailed, down to a Hank’s Notes entry for every part option. The Vintage Steel rims come with “The Colt was one of the most popular cars of the 1970s,” and the Blower Scoop note explains that a giant air intake “forces air into the engine to improve performance.” The X-Tape headlights recall stock car drivers taping up their lights in case they shattered during a race. The task cards and completion bar get the same care, and so do the color pickers.
The animations are detailed too. One scene strips the car, laying its panels and wheels out on the floor around the lift, and another shows the engine bay being refitted. Later the rust gives way to bare silver metal, and after the Reveal Car task the finished car takes a drive along a desert highway.
The visual style is just as carefully designed. Each board floats over a softly blurred 3D room that changes from level to level: the main garage, a lounge with a staircase and hanging towels, a blue workshop and a white bay. In the garage the camera cuts close to whichever part is changing, and the Chrome Valley Customs logo turns up on a roll-up garage door between screens. Taken together, the production values are great.
Locked tool slots and the road past Level 10
We have no criticism to make of Chrome Valley Customs. What follows are limits of what was shown, not faults.
Every level was won, so no failure screen ever came up. Lives stayed at 5 and Full throughout, and the Leaderboard tab beside Tasks was never opened.
We can’t say what the other two tools and the dice do, or when their slots open. Past Level 10, how the boards develop and whether another car follows this one remain open questions.
Picking rims and paint between crate boards
The car theme is pitched at male players. Many match-3 hybrids aimed at men have launched recently, car-themed ones most of all, and the genre keeps coming back to these players because they spend well, one of the cycles casual games go through.
On the boards, the work is swapping tokens to tick off a panel of goals within a move limit while crates break and specials go off. Off the boards, it is choosing parts and colors and watching the car on the lift change to match. That pairing suits a taste for seeing one project take shape piece by piece, paid for a board at a time.
Verdict
A restoration story laid over puzzle levels could easily have stopped at a change of theme. Chrome Valley Customs gives close attention to every layer instead, from the crew’s dialogue to the scenes on the lift and the art around them. The result is made to a high standard throughout.